Thursday, 24 November 2011

Macaron Heaven.

I mentioned in an earlier post that I want to try my hand sometime at making macarons. When I see them, I just fall in love with their perfection and am amazed by the array of flavours that they are created in. This is what has always scared me. Every single one I have ever seen and tasted has been faultless, so they must be ridiculously complicated to make.

I bought a Donna Hay magazine the other week and to my delight there was recipe after recipe of macarons in all different flavours. And they werent that hard!

So today was the day! I went for a long walk in the sunshine and popped by the supermarket on my way home to gather my ingredients. Then walked home with a spring in my step, eager to get started.

All went smoothly until the piping of the mixture onto the baking trays. It helps to have a piping bag, but a zip lock bag with the corner cut off seemed to fix tthat problem - kind of. The mixture just wasn't piped as perfectly as i would have liked; that's all!

Left them to sit for 20 minutes as advised and then popped them into the oven. Note to self for next time: perhaps it would be a good idea to check on the macarons a little before the reccomended cooking time because not all ovens are the same and therefore may require slightly different cooking times! Yes, this means that my macarons were slightly browner than in the picture, but believe me, they still taste good. And still have the soft, delicious inside.

The vanilla buttercream: WOW! I ate my body weight in this and raw macaron mixture before I had even tasted a final product! For some unknown reason, I have always wanted to be able to cook something that required a vanilla bean that needed to have the seeds scraped out of it...got to do it today! So delicious!

Once the individual macarons were cooled, a rather large dollop of artery clogging goodness was spooned onto one side of the macaron and sandwiched with another to create a heavenly treat!
So, bride-to-be (you know who you are!), I have given them a practice run, and they will be just perfect (hopefully) for your kitchen tea! :)


Vanilla macarons with vanilla buttercream


Ingredients
1 1/4 cups icing sugar
1 cup almond meal
3 eggwhites, at room temperature
1 tablespoon castersugar

Method
1. Preheat oven to 150 degrees.
2. Sift icing sugar and almond meal into a bowl and mix to combine.
3. Place eggwhites into electric mixer and whisk on high for 30 seconds. Add the caster sugar and whisk for 10 minutes until stiff peaks form.
4. Fold through almond meal mixture in two batches until smooth.
5. Place the mixture into a piping bag fitted with a 1 1/2cm nozzle and pipe 4cm rounda onto baking trays lined with greaseproof paper.
6. Allow to stand for 20 minutes or until a 'skin' forms on the top of the macarons.
7. Reduce oven temperature to 130 degrees and bake macarons for 17-18 inutes or until crisp on the outside and moist in the centre.
8. Allow to cool completely on trays before spreading with buttercream.

Vanilla Buttercream

Ingredients
125g softened butter
1 vanilla bean, split and seeds scraped
1/2 cup icing sugar
1/2 cup almond meal

Method
1. Place butter and vanilla in electric mixer and beat for 6-8 minutes or until pale and creamy.
2. Add icing sugar and beat for a further 10 minutes or until light and fluffy. Add the almond meal and beat until combined.
3. Spread the vanilla butter onto half the cooled macarons and sandwich with the remaining macarons.
Makes 12.

Source: Donna Hay Magazine, Issue 59, October/November 2011

Pete's request.

At Pete's request the other night, we made little apple, cinnamon and saltana muffins. A very quick and simle recipe, even a boy can do it! No, he really is quite good in the kitchen!

So, we now have 10 muffins and 12 macarons (above post) to get through before we fly to Adelaide tomorrow night. Let's hope we can still fit into the plane seats!


Pete's creation; piping hot and ready to eat!


Basic cinnamon apple muffins

Ingredients
2 cups plain flour
1 tbs baking powder
2 tsp ground cinnamon
3/4 cup, firmly packed brown sugar
2 medium (about 375g) Granny Smith apples, cored, peeled, chopped
3/4 cup seedless raisins
125g butter, melted, cooled
2 eggs, lightly whisked
3/4 cup milk


Tuesday, 22 November 2011

Christmas is a coming!

I have just realised that christmas is just 4 weeks away. Wow, has another year flown! I have never done any christmas cooking beyond making shortbread Christmas trees as edible gifts. So this year is the year! So many things to try!

* A christmas cake or pudding - need to research the difference but im thinking pudding look much more delicious!


* Gingerbread or shortbread. Cannot go wrong!


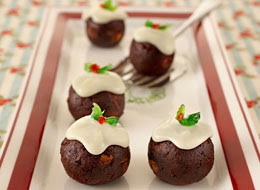
* Little chocolate christmas puddings. YUM!


* And something completely off topic...i'm completely obsessed with macarons. So I am going to give them a go for an upcoming kitchen tea. Fingers crossed they turn out half decent!


Oh, and lets not forget how excited I am to start the count down to Christmas with my advent calendar that Pete bought me. It's no secret that i'm a child at heart!

I do it differently!

The recipe first this time!

Ricotta shells with roasted tomato sauce

Ingedients
16 large pasta shells
500g ricotta
1/2 cup finely grated parmesam
2 egg yolks
sea salt and cracked black pepper
10 sprigs thyme
olive oil, for drizzling
extra finely grated parmesan, to serve
roasted tomato sauce
4 cloves garlic, sliced
6 roma tomatoes, sliced thickly

Method
1. Preheat oven to 200 degrees.
2. Cook pasta shells in boiling salted water for 8 minutes or until al dente. Drain.
3. Combine ricotta, parmesan, yolks, salt and pepper. Fill shells with ricotta mixture.
4. To make the roasted tomato sauce, place the garlic and tomato in an ovenproof dish. Drizzle with olive oil. Roast for 20 minutes or until tomato is soft.
5. Top with pasta shells, sprinkle with thyme and drizzle with oilve oil. Cover and roast for a further 10 minutes or until heated through. Serve with extra parmesan.
Serves 2.

Source: Fast, fresh, simple, Donna Hay, 2010.
Some recipes just dont go to plan the first time you try them, and this was no exception!


Roasted tomatoes: This all looks okay so far!


Where the trouble started: in the supermarket - large pasta shells are somewhat hard to find. So, okay, let's try it with canneloni tubes. The packet says they dont have to be cooked before use, like the pasta shells. Great! Okay, now how to get the ricotta mixture into the shells? I didn't have a piping bag and a spoon seemed to be taking way too long. Aah, a snap lock sandwich bag with the corner cut off. Genius, Pete!

So into the oven they go. Fifteen minutes later I check them and we are faced with hurdle number two. The tubes are rock hard on top and softening on the bottom. So clearly they are cooking from the moisture of the tomatoes on the bottom but there is nothing wet on the top. The only feasible option was a jar of delicious pasta sauce over the top.


Wasn't such a bad idea at all. Actually, i think it added more flavour than a big mouthful of pasta and ricotta with a small piece of tomato. Oh, I havn't mentioned that I am a tomato-a-holic!
The finished product! Makes my mouth water just looking at it! Definitely a favourite already!

Sunday, 20 November 2011

A different beef in black bean.

When I think beef in black bean, it's usually sizzling strips of deliciousness with asian greens at a chinese restaurant. I found a minced beef in black bean recipe the other day, which looked enticingly easy for an after work dinner. So tonight was the night. I cant say it turned out quite like the picture - I literally threw it all together after a long Sunday at work - but it was delicious to say the least.


Went down a treat with the other half. Three bowls later, he decided that he'd had enough! I think he will reap many a benifit of this new blog and my cooking experiments to come!

Minced beef in black bean sauce with rice noodles and asian greens

Ingredients
250g dried rice stick noodles
1 tablespoon peanut oil
600g beef mince
1 medium brown onion sliced thinly
2 fresh long red chillies sliced thinly
350g choy sum chopped coarsley
150g sugar snap peas trimmed
1/4 cup black bean and garlic sauce
1/4 cup kecap manis
1 tablespoon rice vinegar
1/3 cup beef stock
4 green onions, sliced thinly

Method
1. Place noodles in large heatproof bowl, cover with boiling water; stand until just tender, drain.
2. Meanwhile, heat oil in wok; stirfry beaf, onion and chilli until beef is cooked through.
3. Add choy sum and peas; stirfry until choy sum is tender.
4. Add noodles and combine remaining ingredients; stirfry until hot.
Serves 4.

Source: Easy midweek meals, The Australian Women's Weekly, 2007

Chicken and veg pie.

Pies have never really been my thing, but since making this one a few times, i'm feeling a little bit inspired to try some other flavours - both sweet and savoury! I found this recipe while flicking through the many Women's Weekly cookbooks I own. They really are fail proof!

The pie is simple and quick to whip up. Deliciously moist chicken with just a few vegetables; leek, peas and corn. I have come to realise lately that packing a dish full of vegetables isnt always the best idea. Sure, they are full of essential vitamins and minerals, but their flavours dont always meld together so well. The irst time I made it, I was quite surprised at how creamy it tasted with the use of just milk, flour and a small amount of butter. No cream required!

When you get a chance, give this one a go. It sure wont disappoint!

(Usually I would just put a sheet of pastry straight over the mixture, but this time I decided to criss-cross the pastry. Just for something different!)

Chicken and vegie pie

Ingredients
60g butter
1 medium leek, diced thinly
1/3 cup plain flour
3/4 cup milk
1 cup chicken stock
4 cups shreaded cooked chicken
2 1/2 cups frozen peas, corn and capsicum mix
1/4 cup coarsley chopped fresh flat leaf parsley
4 sheets filo pastry
cooking oil spray

Method
1. Preheat oven to 220 degrees.
2. Melt butter in a large saucepan; cook leak, stirring, until softened.
3. Add flour; cook, stirring, until mixture bubbles and thickens.
4. Gradually stir in milk and stock; cook, stirring, until mixture boils and thickens.
5. Add chicken, vegetables and parsley; stir until heated through.
6. Spoon chicken filling into shallow 1.5 litre ovenproof dish.
7. Place one sheet of pastry over filling; spray with cooking oil. Repeat process with remaining pastry, overlapping pastry around dish. Roll and fold pastry around edge of dish. Spray top of pastry with cooking oil spray.
8. Bake, uncovered, in oven for about 10 minutes or until browned lightly.
Serves 4

Source: Cheap and cheerful, The Australian Women's Weekly, 2009.


Pete's beef pho

Pete and I went to Vietnam last December and fell in love with their cuisine. One dish in particular; beef pho. A beef broth with thinly sliced beef and rice noodles. Light and absolutely delicious. We have been wanting to try our luck at making some, but many of the recipes looked rather complicated - what almost looked like pages of ingredients! But while flicking through my recipe books, I found what appeared to be some sort of 'cheats' version - beef stock rather than the boiling of beef bones and so on.

So here is Pete's take on the pho. Almost identical if you ask me! Flavorsome broth made with beef stock and spices as well as the beef slices, tender rice noodles and the mandatory garnish of bean sprouts and spring onions. A definite must try!


Pho Bo


Ingredients

4 cups water
4 cups beef stock
8cm piece fresh ginger (40g), sliced thinly
1 tablespoon fish sauce
1 tablespoon lime juice
2 garlic cloves, quartered
1/3 cup coarsley chopped fresh coriander root and stem mixture
1 star anise
500g piece eye fillet, sliced thinly
375g dried rice stick noodles
8 green onions sliced thinly
2 cups bean sprouts
1/3 cup loosely packed vietnamese mint leaves
1/3 cup loosely packed fresh coriander leaves
2 fresh small red thai chillies, chopped finely
2 lemons, cut into wedges

Method
1. Combine the water, stock, ginger, sauce, juice, garlic, coriander mixture and star anise in a large saucepan; bring to the boil. Reduce heat; simmer uncovered for 10 minutes.
2. Strain broth through muslin-lined sieve into large heatproof bowl; discard solids. Return broth to pan, add beef; return to a boil. Reduce heat; simmer uncovered for about 3 minutes or until beef is cooked as desired.
3. Meanwhile, place noodles into a large heatproof bowl, cover with boiling water; stand until tender, drain.
4. Divide noodles, onion and sprouts among serving bowls; ladle hot broth into bowls. Serve with separate bowls of herbs, chilli and lemon so each person can add what they wish to their bowl.
Serves 4.

(Excuse the photo straight from the recipe book - couldn't find it online!)
Source: 100 Fast fillets, The Australian Women's Weekly, 2007.

An old favourite.

This is one I just have to share. Since I can remember, my mum has baked cinnamon teacake for my sister and I as an after school treat, or when my grandmother came to visit.


Its so simple, light and delicious, and reminds me of mum (and home) when it comes out of the oven and the aroma fills the house.


Generally I would make the cake in a round or log tin, but i mistakenly bought one that was far too big and would leave my cake looking like a pancake! therefore, these little three bight muffins have done the job just as well!

Cinnamon Teacake
 
Ingredients
60g butter
½ cup castor sugar
1 egg
1 teaspoon vanilla
1 cup self-raising flour
1/3 cup milk
15g butter, extra
1 tablespoon castor sugar, extra
1 teaspoon cinnamon
Method
Have butter and egg at room temperature.
1. Cream butter, sugar, egg and vanilla until light and creamy.
2. Stir in sifted flour and milk, beat lightly until smooth.
3. Spread mixture into well-greased 20 cm sandwich tin, bake in moderate oven 15 to 20 minutes.
4. Turn onto wire rack, sprinkle with combined extra melted butter, sprinkle with combined extra sugar and cinnamon.
Serve warm with butter.


A twist on Donna Hay's summer tomato pasta.

I have been craving prawns for at least the last month! So for last night's dinner, prawns were on the menu!

Donna Hay's summer tomato pasta is light and delicious for a summer evening. I decided to add and remove a few ingredients to put my own twist on things, and this is how it turned out...


Delicious right? Simply added prawns cooked in olive oil and garlic, removed the zucchini slices and traded buffalo mozarella for torn baby bocconcini.


For those playing at home, here is the original recipe.

Summer tomato pasta

Ingredients
200g spaghetti
300g cherry tomatoes
2 zucchini (courgette), sliced with a vegetable peeler
1 tablespoon lemon juice
1 tablespoon olive oil
1 clove garlic, crushed
⅓ cup basil leaves
⅓ cup mint leaves
sea salt and cracked black pepper
1 buffalo mozzarella, torn into pieces

Method
1. Cook the pasta in a large saucepan of boiling salted water for 8–10 minutes or until al dente. Drain.
2. While the pasta is cooking, make an incision in each tomato using a small, sharp knife. Tear in half, squeeze out the seeds and discard.
3. Toss the pasta with the tomato, zucchini, lemon juice, olive oil, garlic, basil, mint, salt and pepper.
4. Divide the pasta between serving plates and top with mozzarella to serve.
Serves 2.


Saturday, 19 November 2011

I did it!

Its late on a Saturday night, and I have just had dinner with a friend. We talked all night about our food adventures and experiments. She is an avid food blogger (http://applesundermybed.blogspot.com/) and has inspired and encouraged me to create my own! So here goes!

I have recently started scouring my cookbooks each week for delicious dinner ideas, as well as watching back to back episodes of the ever so sensuous Nigella Lawson. Her english accent and honesty when it comes to food captivates me for hours!

So here I will post photos and recipes of all my food experiements, good and bad. But mostly good! Wish me luck! X