Friday 30 December 2011

Stained glass stars

My christmas baking wish list sadly wasnt completed this year. But I did try something I have always been a little bit facinated with. Stained glass stars. They look too pretty to eat and i've always wondered how they got that stained glass effect in the middle.

They are a little but time consuming - waiting for the dough to chill in the fridge and then rolling and cutting over and over - but they taste delicious with their different flavoured centres.

Pre-baking: Two different sized star cutters are used so you end up with both a small shortbread star and a large star with a fruit drop in the middle.

Post-baking: golden shortbreads and melted, transparent fruit drops.

Enough to feed an army, but so pretty!


Stained glass biscuits


Ingredients
125 g butter
2/3 cup icing sugar
1 tsp vanilla essence
2 cups plain flour
1 egg  
Fruit flavoured boiled lollies

Method
1. Preheat oven to 180 °C. Line 2 baking trays with non-stick baking paper. Using electric beaters, beat butter and icing sugar until light and creamy. Beat in vanilla and egg.
2. Mix in flour with a knife until evenly combined. Gather dough into a ball. Turn out onto a sheet of non-stick baking paper. Press out dough, then roll to 5mm thickness.                                                     3. Use larger star biscuit cutter to cut star shapes from dough (cut the shapes close together to get as many as you can first time around). Pile scraps together (don't knead them) and gently roll out again. Cut more shapes. Repeat to use as much dough as possible.                                                    
4. Place onto the prepared trays. Use smaller star cutter to cut out the centre of the biscuits and set aside.                                                       
5. Place one boiled lolly in the middle of each larger star and bake for 10-15 minutes or until lolly has completely melted and shortbread is just started to turn golden.
6. Cool on trays for 15 mins then transfer to a wire rack to cool completely.


 

Wednesday 7 December 2011

My first risotto.

I have fond memories of a delicious risotto that my mum used to make every now and then. Ever since I moved out of home, it's something that i've been dying to try!

I found Jamie Oliver's basic risotto recipe online that I used as a base, adding and omiting ingredients.

Overall, I was pretty impressed with the outcome. It could have been a complete disaster seeing as it was my first experience! It was quite flavoursome, but I still think it was missing something...mushrooms maybe?

Jamie's basic risotto

Ingredients
1 litres chicken stock
1 knob of butter
2 tablespoons olive oil
1 large onion, finely chopped
2 cloves of garlic, finely chopped
½ a head of celery, finely chopped (I omitted)
400g aborio (risotto) rice
2 wine glasses of dry white vermouth or dry white wine
sea salt and freshly ground black pepper
70g butter
115g freshly grated Parmesan cheese
     

Method
stage 1Heat the stock. In a separate pan, heat the olive oil and butter, add the onions, garlic and celery, and fry very slowly for about 15 minutes without colouring. When the vegetables have softened, add the rice and turn up the heat.

stage 2
The
rice will now begin to lightly fry, so keep stirring it. After a minute it will look slightly translucent. Add the vermouth or wine and keep stirring — it will smell fantastic. Any harsh alcohol flavours will evaporate and leave the rice with a tasty essence.

stage 3
Once the vermouth or wine has cooked into the rice, add your first ladle of hot stock and a good pinch of salt. Turn down the heat to a simmer so the
rice doesn’t cook too quickly on the outside. Keep adding ladlefuls of stock, stirring and almost massaging the creamy starch out of the rice, allowing each ladleful to be absorbed before adding the next. This will take around 15 minutes. Taste the rice — is it cooked? Carry on adding stock until the rice is soft but with a slight bite. Don’t forget to check the seasoning carefully. If you run out of stock before the rice is cooked, add some boiling water.

stage 4
Remove from the heat and add the butter and Parmesan. Stir well. Place a lid on the pan and allow to sit for 2 minutes. This is the most important part of making the perfect risotto, as this is when it becomes outrageously creamy and oozy like it should be. Eat it as soon as possible, while the
risotto retains its beautiful texture.

a basic risotto recipe 

My additions:
* I added one chopped onion in with the onion.
* I used 600g chopped chicken breast to the risotto. Cook chicken in a pan until it is just cooked through and add to the risotto at the last minute to ensure it stays moist and tender.
* I added peas when I added the chicken - just because that's what mum used to do!

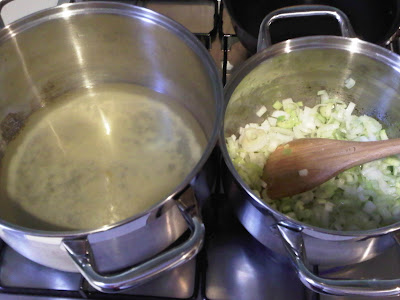
Hot chicken stock and onion and leek mixture

Adding spoonfuls of chicken stock to the rice

Delicious!

Our Christmas tree! 18 days and counting!


Chicken on a stick.

This is a very easy and very delicious midweek meal idea. I adapted it from a recipe I saw while, once again, flicking through cook books in bed!

Marinated chicken and onion skewers with couscous

Ingredients
600g chicken breast
Jar of marinade (I used Masterfoods honey, soy and garlic)
1 red onion
10-12 wooden skewers
1 1/2 cups couscous
1 chicken stock cube
Handful of saltanas
Handful of slivered almonds
1 bunch of baby broccolini

Method
1. Cut chicken into small cubes and place in bowl. Add marinade and coat chicken well. Chicken can be placed into the fridge for just 20 minutes to marinate but I prefer to leave it overnight.
2. Chop onion into large pieces and thread onto skewers in between pieces of marinated chicken. If you wish to barbeque skewers, make sure to soak you skewers for one hour before adding food to prevent burning.


3. Place skewers into a grill pan and cook on a low heat for about 20 minutes. To ensure they are cooked, I cut the largest piece of chicken in half after around 20 minutes. Don't be too concerned if they start to burn on the outside. It is often just the marinade and it just adds to the flavour!
4. When the skewers are about three quarters cooked, cook the couscous as per packet instructions. A trick that I learned from a friend recently is to add a cube of chicken stock to the couscous for added flavour. Also, add the broccolini to the steamer. I like the broccolini to still be quite crunchy so I leave it until almost the last minute.
5. Once the couscous is cooked, mix it carefully with a fork to separate the grains. Add the saltanas and almonds and spoon into the middle of the plate.
6. Add the skewers to the top of the couscous pile and the broccolini to the side.
Serves 2. - possibly with lunch leftovers for someone lucky!